> ## Documentation Index
> Fetch the complete documentation index at: https://bunnynet-cb9733c2-claude-jolly-knuth-4rxce7.mintlify.site/llms.txt
> Use this file to discover all available pages before exploring further.
# Endpoints
> Expose your container to the internet using CDN or Anycast endpoints.
Once you have a [deployed container](/magic-containers/quickstart), you can expose it to the internet using two endpoint types: **CDN** for HTTP(S) traffic or **Anycast** for direct IP access.
## CDN
CDN endpoints route HTTP(S) traffic through bunny.net's edge network, improving performance and reducing latency based on user location.
For more information about CDN, see our [CDN
documentation](https://bunny.net/academy/cdn/what-is-a-cdn-content-delivery-network/).
To create a CDN endpoint:
1. Go to **Magic Containers** and select your container.
2. Click **Endpoints**, then **Add New Endpoint**.
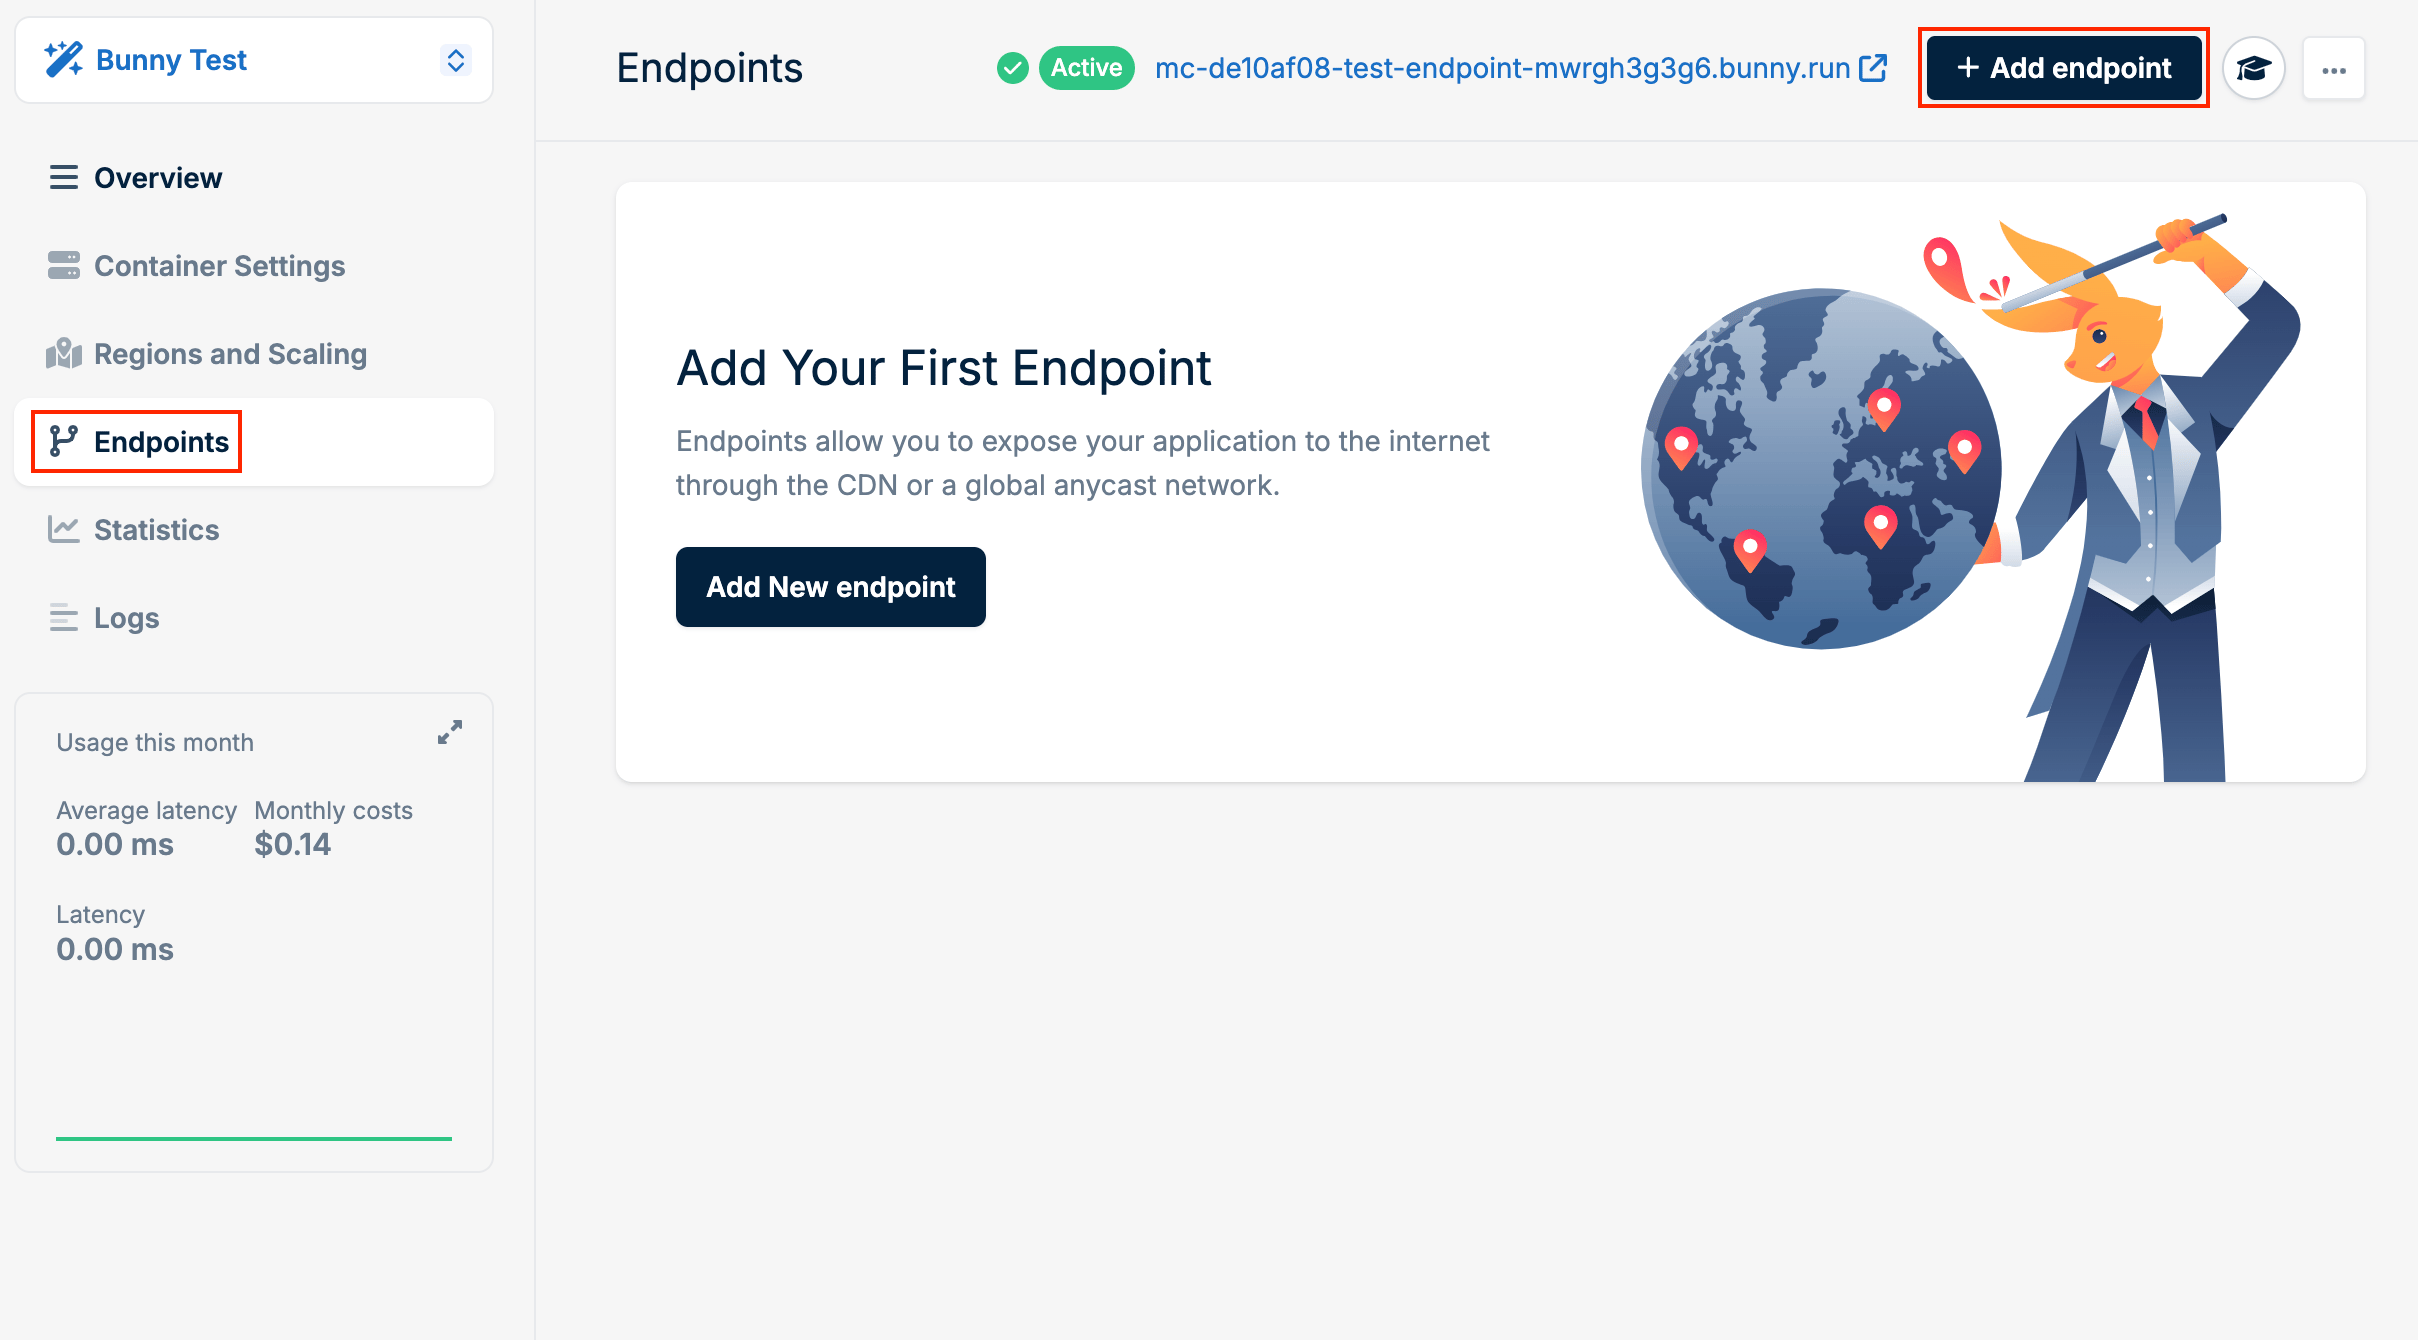 3. Select **CDN** as the type.
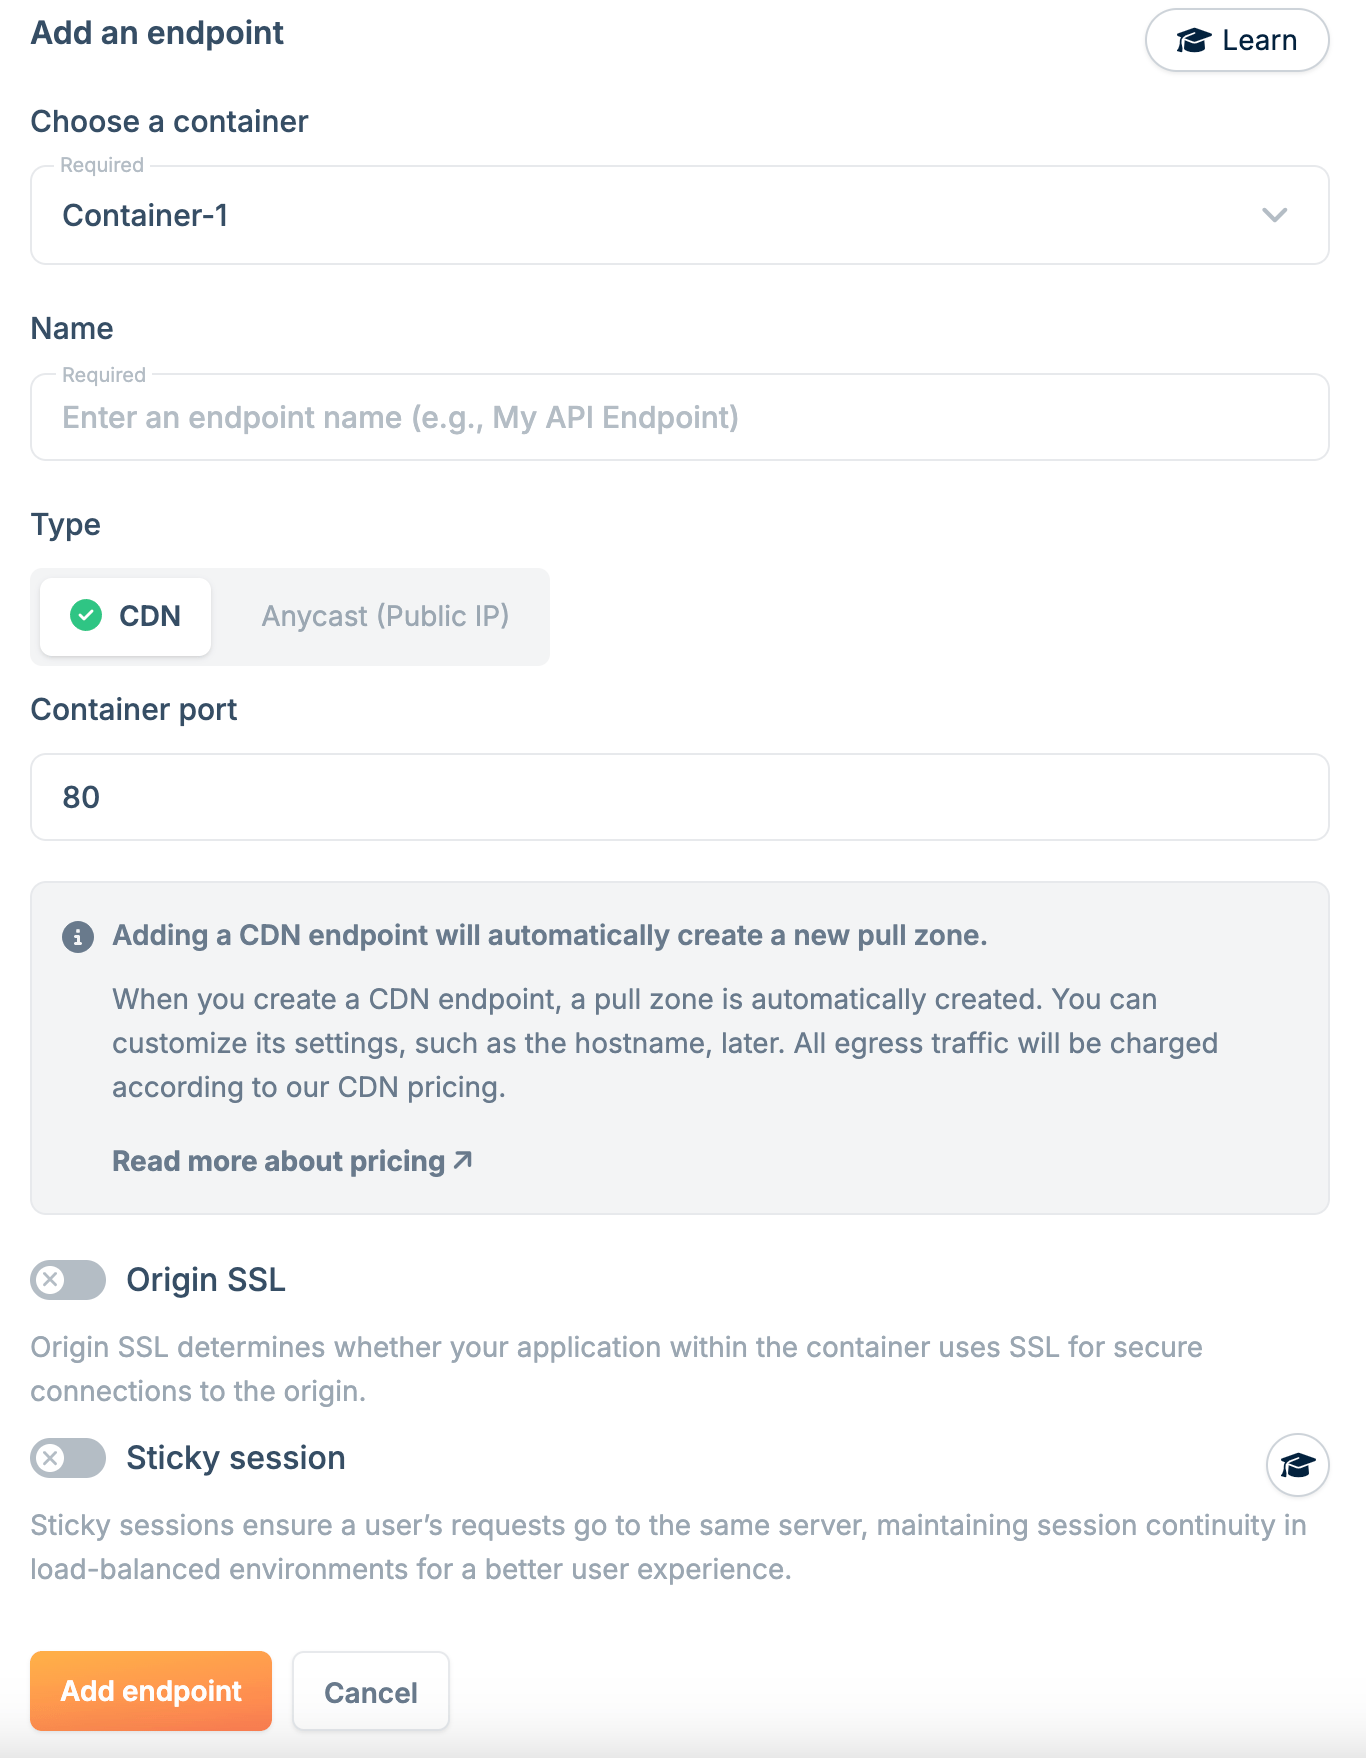 4. Configure the endpoint:
* **Name**: A unique name for this endpoint.
* **Container Port**: The port your application listens on.
* **SSL for origin**: Enable if your application uses SSL internally.
It's recommended to run one process per container. If running multiple
processes, ensure they use different ports.
5. Click **Add Endpoint**.
### Sticky sessions
Sticky sessions ensure all requests from a client are routed to the same server instance, maintaining session state across requests.
To enable sticky sessions:
1. In the endpoint configuration, select **Sticky Session**.
4. Configure the endpoint:
* **Name**: A unique name for this endpoint.
* **Container Port**: The port your application listens on.
* **SSL for origin**: Enable if your application uses SSL internally.
It's recommended to run one process per container. If running multiple
processes, ensure they use different ports.
5. Click **Add Endpoint**.
### Sticky sessions
Sticky sessions ensure all requests from a client are routed to the same server instance, maintaining session state across requests.
To enable sticky sessions:
1. In the endpoint configuration, select **Sticky Session**.
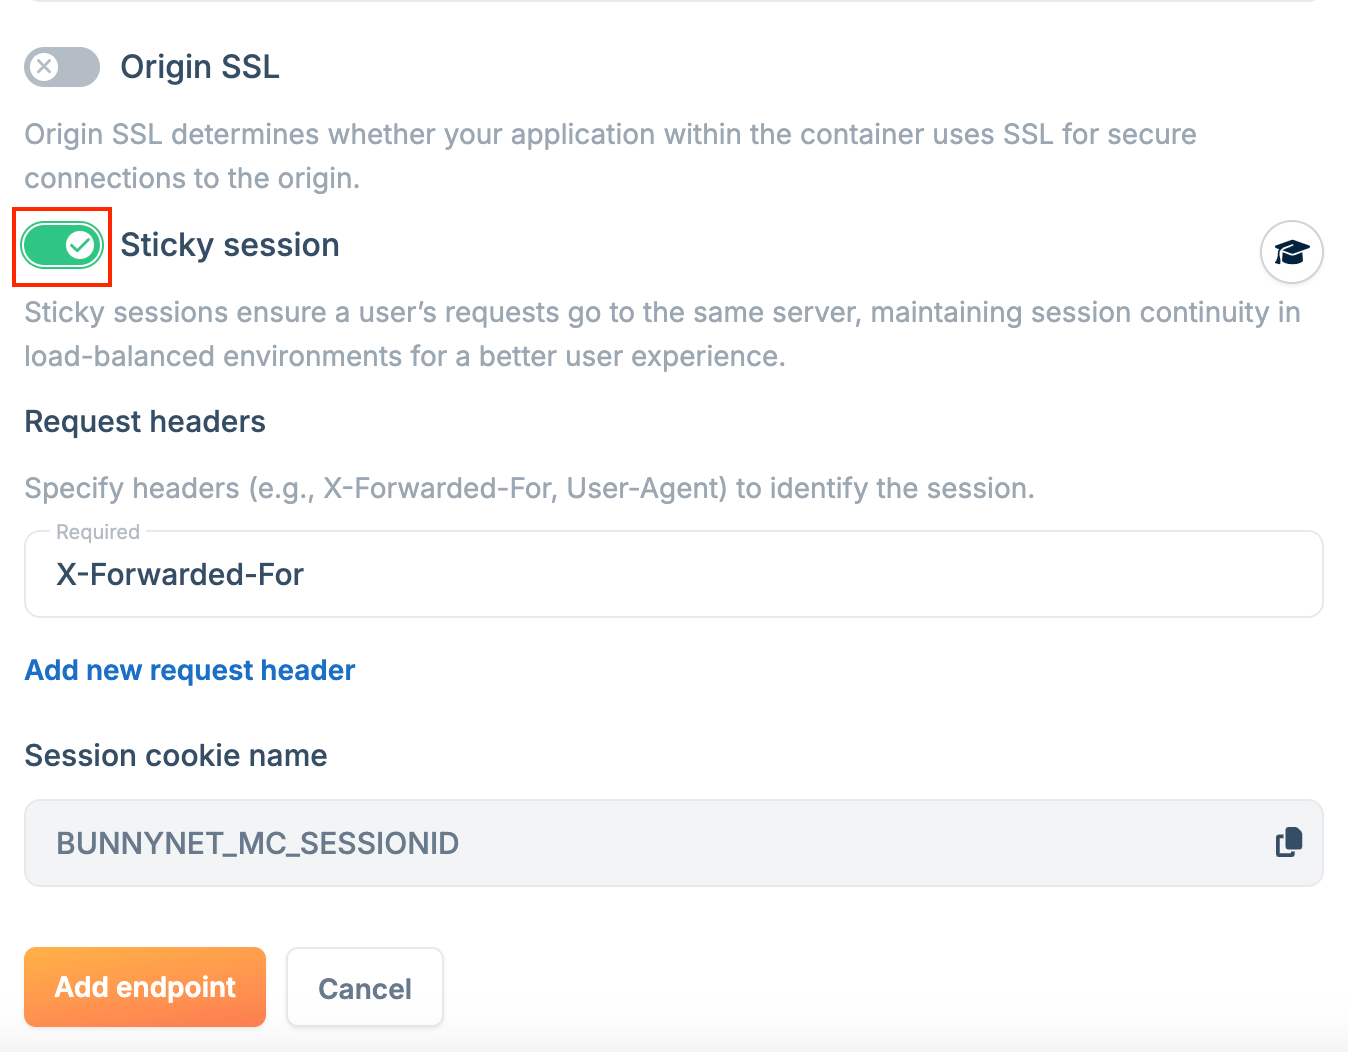 2. Choose an identifier (headers like `X-Forwarded-For` or `User-Agent`, or cookies like `SessionID`).
3. Click **Add Endpoint**.
## Anycast
Anycast endpoints map your container to an Anycast IP address, routing requests to the nearest node for improved performance.
To create an Anycast endpoint:
1. Go to **Magic Containers** and select your container.
2. Click **Endpoints**, then **Add New Endpoint**.
2. Choose an identifier (headers like `X-Forwarded-For` or `User-Agent`, or cookies like `SessionID`).
3. Click **Add Endpoint**.
## Anycast
Anycast endpoints map your container to an Anycast IP address, routing requests to the nearest node for improved performance.
To create an Anycast endpoint:
1. Go to **Magic Containers** and select your container.
2. Click **Endpoints**, then **Add New Endpoint**.
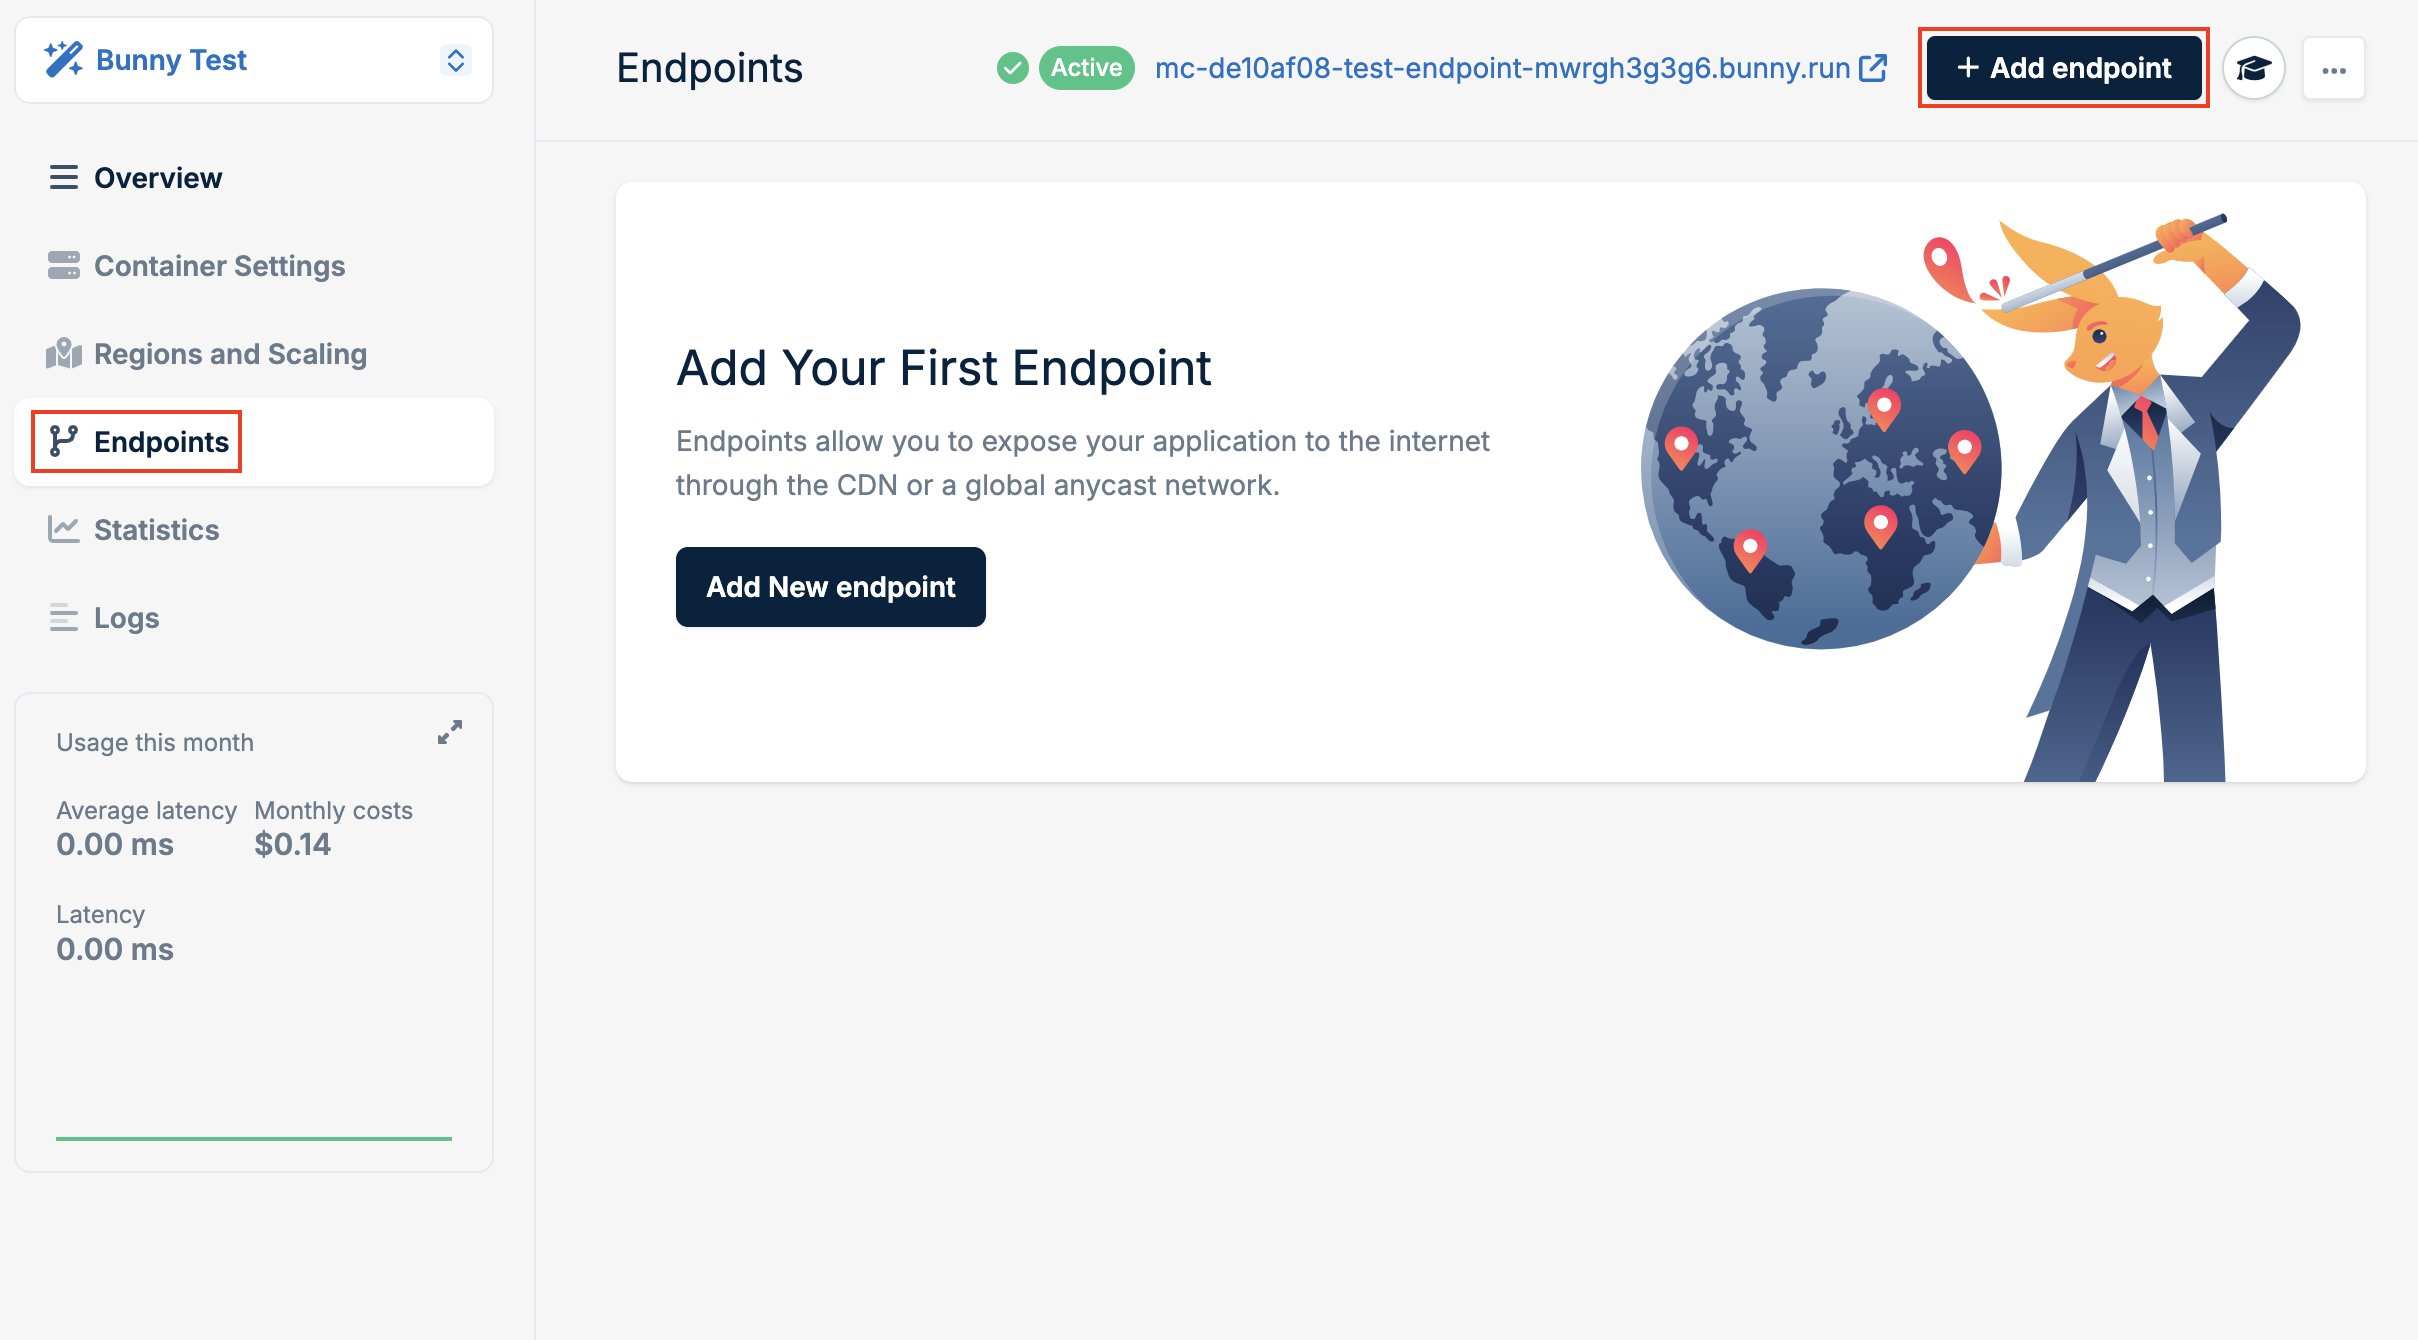 3. Select **Anycast** as the type.
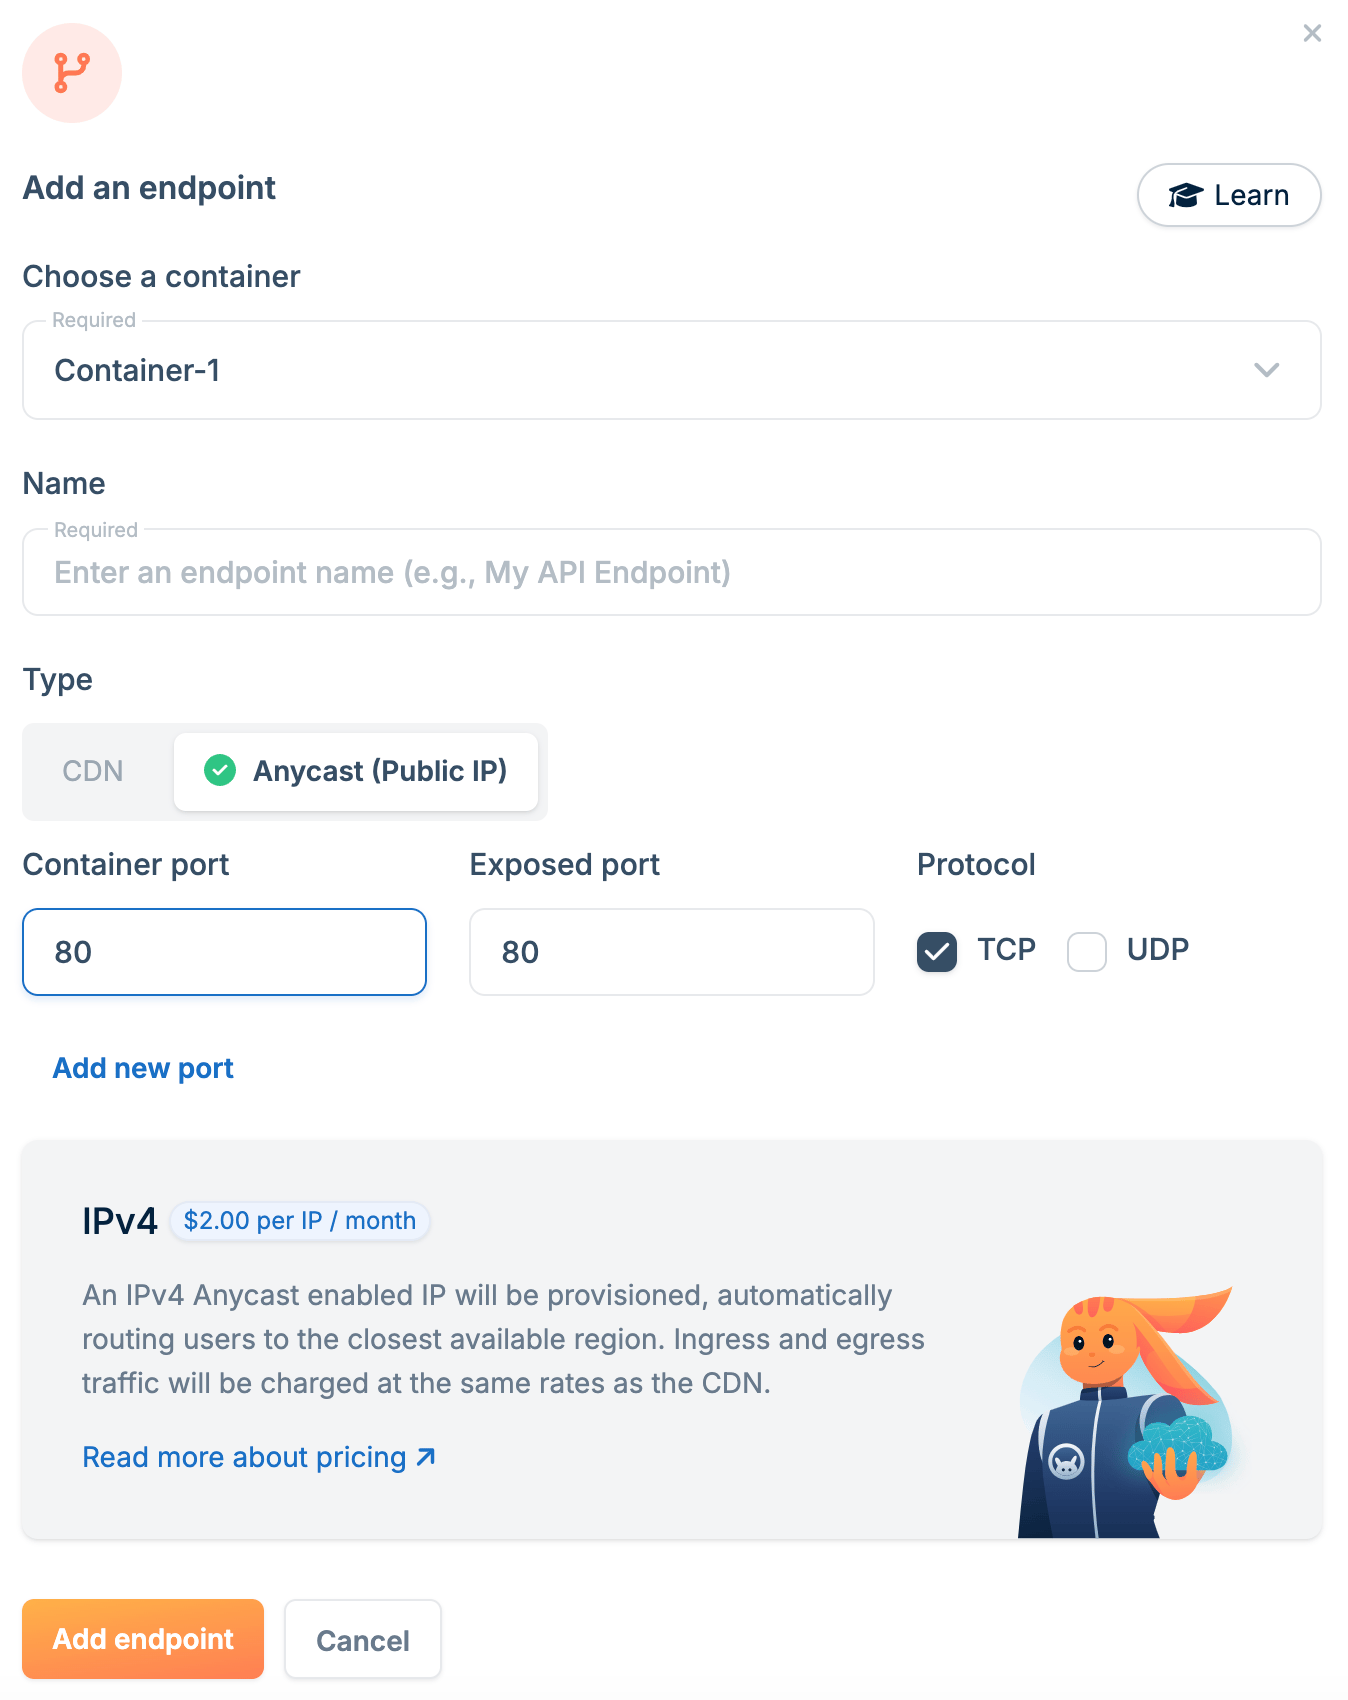 4. Configure the endpoint:
* **Name**: A unique name for this endpoint.
* **Container Port**: The port your application listens on inside the container.
* **Exposed Port**: The port available on the Anycast IP.
5. Click **Add Endpoint**.
4. Configure the endpoint:
* **Name**: A unique name for this endpoint.
* **Container Port**: The port your application listens on inside the container.
* **Exposed Port**: The port available on the Anycast IP.
5. Click **Add Endpoint**.